Monday, October 8, 2012

Android or iPhone? The Infamous Question.

I am sure that everyday Google receives thousands of searches asking, Android or iPhone?  I am hoping that one of those searches landed you here and I can shed some light on your question.
Let me give a little background information about myself before I delve into the pros and cons of each of the phones.


Background

I have only been in the smartphone market for four or so years now. My first phone was the iPhone 3GS followed by an iPhone 4S two years later. I then got into mobile development and needed to purchase an Android phone. I bought the Galaxy Nexus and actually intended on only using it for development purposes. After about a month of using the Nexus I gifted the 4S to the wife and have never asked for it back.

iPhone 5 (iOS 6)

*disclaimer - I have limited experience with iOS 6 (wife's phone) and have absolutely no first hand experience with the iPhone 5 but do have lots of experience with previous generations.

iOS 6 - Really no Different from iOS 5 (Except it crashes a lot)

The iPhone 5 / iOS 6 package has got to be one of the most disappointing product releases I have seen from Apple. While the numbers on paper look really good (benchmarks on the processor) and LTE is a nice but necessary addition, everything else is a huge let down. The OS is really no different from iOS 5 (except for facebook integration and passbook .. lame). The screen is larger but not by much and only in one dimension. The camera is the exact same and I really couldn't care less about the weight loss.  You can't wait two years for a phone upgrade to really not change anything in the process.  I was hoping by issuing the iPhone 4s that they were saving something special for the iPhone 5.  I was wrong.

Lack of Innovation

Apples big problem is that they are no longer in the front of innovation. They've gotten boring ... quick.
I think a recent ad I saw for the Samsung S3 sums it up.  The iPhone is no longer a phone for us. Its a phone for our parents (the type of people who wouldn't find this blog). The phone is safe, reliable and absolutely boring. Apples need for absolute control has killed the creative process and left a product without excitement.  The innovation on this phone stopped a long time ago.  When I see my students at school with Android phones, they're excited ... They brag about them.  My students with iPhones just use them.

Cloud Computer on the iPhone

Another big downfall with Apple is their iCloud.  I don't know how many of you have used it, but I find it to be an absolutely horrible product.  Trying to share documents / photos without a file structure or web interface is a nightmare.  All I want to do half the time is send a link to a friend so they can download a file I have, good luck trying to do that with iCloud.  I feel like I have absolutely no control of the product.  In the process of trying to make cloud computing available for the masses, they have completely destroyed all control I have over the situation.  I once had photostream on and found it to be slow and got annoyed that every photo I took became part of my photo albums.  I take a lot of dumb photos with my phone, the last thing I need is every one of them to be part of my photo collection.  I could spend a whole article talking about the downfalls of iCloud, but don't want to make that the focus of my article.  

While the iPhone served me well for almost three years, the lack of change and innovation has turned me off.  There's nothing fun or excitement left.  It

Pros
  • Very fast processor (best feature on the iPhone)
  • Slightly larger screen (however still much smaller than other android phones)
  • Reliable (once again, not as reliable as it once was ex. maps)
  • Lot of options for music/video in the iTunes store

Cons
  • Nothing new (Boring)
  • No Innovation with the software
  • Lack of freedom in app design
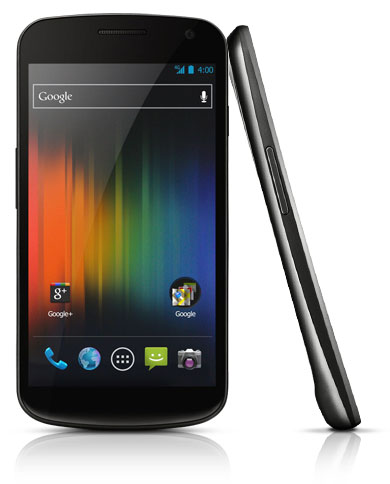
Android - Galaxy Nexus, Samsung S3, etc (Jelly Bean 4.1.1)

Android is a software platform that is capable of running on many different devices.  I personally own the Samsung - Galaxy Nexus so will be commenting on that specifically.  However, the comments that I make are relevant to any of the Android phones running Jelly Bean (newest Android operating system).  

I hesitated buying an Android phone for the longest time.  I heard from many people they were complicated, ugly, slow and unreliable.  I do have to agree that at one point they were.  However, I've seen HUGE improvements in the android operating system over the last year.  Ice Cream Sandwich (version 4.0) was a huge upgrade and the newest version Jelly Bean (4.1) has just made the Android experience even better.  Every time an update gets issues by Google, my phone gets more reliable, more stable and gains a whole load of new features.  

Ability to Run Applications in the Background

Imagine a computer that couldn't run programs in the background.  As I type this article on my computer I probably have about 5 different things going on.  One of the major advantages of the Android is that it allows you to run processes in the background.  I can create an SSH tunnel in leave it running in the background so that I can have a secure connection with my home computer.  I can have Google Plus running in the background so that when I take a picture, it is automatically uploaded to my account.  The possibilities are infinite.  There is always the possibility that these background processes might slow down or ruin the phone experience, but the reality is these phones are like computers nowadays, they have the processing power to do multiple things at once.

Customization

One of Android's most powerful features is its ability for customization.  I can use widgets, select which icons I want on my home screen, run custom launcher applications so I can change my home screen experience.  Everyday I come across new features that allow new possibilities on my phone.  I just recently downloaded the NOVA launcher and it is an absolutely amazing launcher.  Has completely given my phone a new feel with just a single download.  

Complete Integration with Google Products

I don't know about you but I use Google products for just about everything.  I have everything from email to this blogging site all done through Google.  With the android phone all of this is completely integrated into the phone.  I can feel confident my phone will not be removing Google maps for some other junk product (see iOS).  Google Now is a new product that has just been released and is integrated with Jelly Bean.  It is an amazing tool that alerts me to many things including when I need to leave in order to make my appointments on time.  Google Now is the future of mobile software and I recommend you check it out if you haven't heard about it yet. 

Performance

Android phones have typically been ahead of the game when it comes to all measures of performance (cpu, memory, screen size, etc).  I will concede that the iPhone 5 has a fast processor but that will be short lived.  I give it one month before an Android phone jumps ahead and then Apple will be behind the game again for 11 months.  Apple brags about the new screen size on their phone, this is still much smaller than most Android displays.  I find it ridicules they made no effort to increase the width of the phone.  That was a really lazy solution on their part.  

Pros
  • Performance is always ahead of Apple
  • Customize all aspects of the phone
  • Run background services
  • Integrate with Google products
  • More Innovative Apps
Cons
  • Less apps available in the store (this is slowly become less true everyday)
  • Can be a little battery hungry
  • Caution is required as there is more possibility for malware
  • Learning curve might be a little more difficult than Apple
Conclusion

After reading my article I hope I've convinced you to jump on board with an Android.  Don't get me wrong, I do think the iPhone is the right choice for some people (my parents).  It's just that if you've done enough research to get to this blog, I imagine you want a phone with options and innovative products.  Android will definitely meet if not exceed all your expectations in a phone.


Monday, October 1, 2012

Getting Started with Investing - Mutual Funds

There are probably quite a few of you out there who know they should be starting to invest money for their future but just keep putting it off for another day.  Now is the time to get started with your investment portfolio and there is no better way then starting with a solid mutual fund.

Why Mutual Funds?

If you're just getting started with investing, I'm going to go out on a limb and assume you're probably not a millionaire.  Trying to buy/sell stocks can be time consuming, expensive and a very risky proposition.  Mutual funds are cheaper, more reliable and can be as risky as you would like.  While stocks need to be watched, mutual funds are professionally managed and you can set back and let a paid professional do all the hard work.

What is a Mutual Fund?

A mutual fund is a professionally managed fund of pooled money from many investors that allow opportunities that might not be available if you were investing just your own money.  Let's say for example a company needed to raise money for expansion and wanted to issue a bond (take out a loan) for 10 million dollars in order to do so.  On your own you wouldn't have the money or the connections to lend 10 million dollars.  However, by getting involved in a mutual fund, your money could go towards that cause and get you a nice little return.  The same logic is applied to stock purchases (no way are you going to buy hundreds of stock with your small monthly investments), but by purchasing mutual funds you now have that option because you are pooling your money with many others.

How to Pick a Mutual Fund

It can be very intimidating trying to pick a mutual fund in which to invest with.  There are many factors that you need to take in to consideration.  A financial advisor might try to have you invest with many mutual funds to try and balance your portfolio, I don't think this is necessary in the beginning and I believe they are only doing this to try and up their own commission a lot of the time.  I personally think you are just better off buying a balanced mutual fund in the first place.

Why would I buy a whole bunch of chocolate bars on their own when I could just buy a variety pack? (get the analogy?)

I am going to list the different factors you need to take in to consideration when you buy a mutual fund and then go through them one by one as to how I handle them.
  1. Risk
  2. Size
  3. Cost
  4. Reliability
Risk

The majority of mutual funds are going to be made up of a combination of stock (ownership in a company) and bonds (loans).

The general rule is that stocks are riskier, but a better long term investment and that bonds are more reliable but not as good in the long run.  I once read in a book that the younger you are, the more stock you should own (more return in the long run).  To figure out how much stock you should own, subtrack your age from 100%.  For example, I'm thirty so 100%-30% = 70%, I should own 70% stock and 30% bonds.  The reason this works is that the older you are, the less risk you can take on and so you want to be more weighted towards bonds.

Now, I'm based out of Canada so I will be using Canadian sources for my Mutual Funds.  If you're out of a different country, you should be able to find the same information but just on a different website.

Let's look at a sample mutual fund I use, CIBC Monthly Income Fund


The CIBC Monthly Income Fund is about a 50/50 mix between stock and bond.  This would be a good starter mutual fund with a medium risk.  The bond will act to stabilize the price against changes in stock prices while still maintaining a nice return.  If you look at a further break down of the equity (stock) you will see its broken up into many different sectors.  This will prevent you from being vulnerable to any particular sector.  Very good for a first mutual fund.

Now lets look at a mutual fund that might be more risky, CIBC Energy Fund


This one is mostly stock (93%) and happens to be focused only on the energy sector.  While you might get lucky and score big with this one in the long term, it is a risky venture in the short term.  This fund is actually down 28% on the year. A further look into the equity breakdown and you see it's 87% in the energy sector, leaving you vulnerable if the sector drops in price.

If you want to take your risk analysis to the next level, you should all look at the company size of the stocks that are being bought.  If they are large companies (ex. Apple, Walmart, etc etc) there really isn't much chance for huge fluctuations in price.  If they happen to be small to medium companies then there will be more risk as the stock price is more susceptible to large variations.

Size of the Mutual Fund

The size of the mutual fund is also important to me.  A larger mutual fund means that it will have more buying opportunity.  A larger mutual fund also means that the expenses will be kept lower.  If there's more money in the pool, they don't need to spend as much on trades and paying managers.  Also, if there's lots of money in the fund, then there's got to be people with money throwing it into there and people with money usually make smart decisions.

Before I make a decision as to which mutual funds I'm most interested in, I'll look at all the mutual funds available at my bank and see what the Total Assets are.  I usually spend more time looking into the ones with more money.

Cost

The total cost of the mutual fund to you should be a large factor in whether to buy it or not.  There are many places along the line where you will be paying so you need to investigate all factors.  

The first thing you need to check is if there is a price to buy/sell the mutual fund.  Some companies do have costs to buy and sell.  I prefer to deal with those that don't but then again you might get a good deal on the management fee if you do pay to buy and sell so keep that in mind.

The other big cost you need to look at is the MER (Management Expense Ratio).  This tells you the percentage of your money that will go to pay for management and trades.  You want to keep this value as low as possible!  Even a small percentage will make a difference in the long run.  

The CIBC Monthly Income Fund I mentioned earlier has a MER of 1.48%.  That means that every year 1.48% of the total amount invested will go to fees.  This can add up pretty quick so make sure to keep this as low as possible.

Last Words of Advice

Depending on your country, you might want to register your investment as a retirement plan or a tax-free savings account.  This will provide further tax benefits to your investment.  Myself being located in Canada has the option as registering a mutual fund as a Tax Free Savings Account.  Most people aren't aware that investment accounts can be registered as tax free.  That means that I can invest $5000 a year into mutual funds or whatever account I choose and pay absolutely no tax on the income.  That is hugely important and if you are in Canada, I recommend you make use of the tax free savings account.

Hopefully this provides a bit of a starting point for you into the world of buying your first mutual fund.  I'll edit this post as time goes on to try and provide a little bit more information.

Please feel free to leave any comments or questions!

Sunday, September 30, 2012

Review: Sling Media Slingbox PRO-HD

Now that football season has started for the year, I wanted an easy way for me to watch the games while still managing to get some work done on my computer.  There was no cable connection in my office and I really didn't feel like installing one so I needed a solution that could use WIFI to stream video from my cable box downstairs to my office.

There are many ways to go about accomplishing this task but I was really looking at something that could do it

1. Cheap (Didn't want to spend more the $250-300
2. Easy (I don't have time to build a custom solution, nor the interest right now)
3. Integrate with my current HD-PVR so that I could stream saved videos from there
4. Be able to stream my video over the internet as well as in my home network.

When I found that the Slingbox PRO-HD was on sale at my local London Drugs for $249.99 I jumped on the opportunity.  For those of you who don't know, London Drugs is a drug store located in western Canada and it is my GO TO electronics store.  It's a fraction the size of a conventional electronics store but they carry everything!  I highly recommend it to anyone.  Where else do I get to play on the Nexus 7 table while I wait for my prescriptions to be filled?

Anyways, there were two choices available at London Drugs.

Slingbox SOLO

-Must work with a digital/hd cable box
-Can't stream HD content

Slingbox PRO-HD (The one I got)

-Can accept input from coax (it's got a cable tuner) or cable box
-Can stream HD content

I went for the PRO-HD as I needed to accept coax on its own (when the wife is using the box) and I also wanted the ability to stream HD.


Setup the Connection

One of my biggest worries when it comes to buying electronics is the cost I'm going to have to spend on cables to set it up.  I was really worried with the SlingBox that I was going to have to get a new component/hdmi cable and add another 10-20% on top of the price just in cables, was I ever wrong.  This product came with ALL the cables.  I don't think I've ever seen a product come with so many cables.  It came with anything you might have needed, component, svideo, coax, sound, video, IR Blaster, etc etc.  That was a VERY pleasant surprise.

The cable setup was a breeze, I just required two inputs to the box, one was a straight coax (when I couldn't use my box) and then the HD components feeding through the sling box to my TV.  Took me about 5 minutes to set up, was easy and intuitive and in no way affected my current setup, which was great.

Set up the software

One of the nice features of the SlingBox that I didn't realize at the time I bought it was that all the software is handled through your web browser.  There is not a single program you need to download and install on your computer.  All I had to do was point myself to www.slingbox.com and the web browser took care of all the set up, from downloading the software updates to streaming the video to my computer.

Within a matter of another 10 minutes, I was done and had the video streaming to my computer.


Using the built in TV Guide (As shown on the left) and the remote control feature (uses an Infrared Blaster to control your box) you are free to do whatever you need to.  The TV Guide really was a nice feature for me, just find the tv show you want, click and the IR blaster will immediately change the box to the channel.  If you have a PVR you can control play/record/pause/rewind/anything you could do from a remote control.

You can see from the picture above, the quality is really nice and can be made to fit any size you need.  Yes I know its the show breaking amish, my wife was watching it downstairs and I couldn't change the channel (We only have one box, I don't want to buy another).  Luckily with the PRO-HD I can switch the input to the standard coax and use that as my input when my wife is using the HD box.  Once again, I'm too cheap to buy another hd box.

Internet Streaming

The SlingBox has built in software to stream your cable box over the internet.  This was actually one of the reasons the company was founded in the first place, so that people could watch their sports games over the internet.  You can either stream to another computer or a smartphone/tablet.  There is software for both iOS and Android.

To watch the steam on a different computer, just follow the same procedure.  Go to www.slingbox.com log on and you are ready to go.  It could not have been easier.  If you want to have good quality video, you will need to make sure your home internet connection has a good upstream bandwidth.

If you want to stream to your smartphone/tablet, you will need to buy software from google play/the app store.  The cost is a bit pricy ($29.99) but does work very well.  To date I have not had a single problem streaming with either desktop software of the android software.  There is however a limitation of a single stream at a time.  So don't count on you and wife both using it simultaneously 

The Good and The Bad

As of the writing of this blog, I've had the product for 2 weeks and feel I know have a good overall impression of the product.

Pros

  • Easy setup
  • Good Price (I think $250 is reasonable)
  • Can be streamed over the internet
  • Picture quality is amazing
  • Easy to control the TV
  • Nice looking unit
  • Accepts many different inputs
  • Very easy to use
Cons
  • Software is dependant on their website (I don't know what would happen if they ever went out of business or their website went down?)
  • The video stream is encrypted and can not be saved (Though can be saved on your pvr and streamed from that)
Overall I highly recommend the product

4.5/5

Please feel free to post if you have any questions or comments or experiences with the SlingBox yourself.


Thursday, September 6, 2012

Automating Video Conversions with Handbrake for AppleTV

The Background Story

I've got a second generation AppleTV.  Not the 1080p, but the one that does 720p.  I have to say that out of all the electronics I own, it probably gets the most use at the most reasonable price.  This thing gets turned on daily and if it weren't for NFL it would probably allow me to cancel my cable account.

In case you are living under a rock and are unfamiliar with the thing here is a link to the apple store that provides a little bit more information. Essentially, you get a nice little box, capable of 1080p for $109.  You keep all the video files on your computer and stream them whenever necessary.  


The one downfall with the AppleTV, as I learned quickly is that its very limiting in the video formats that it is capable of playing.  Other than .mp4, there's really not much you can play.  Luckily, the majority of TV shows that are ripped these days do meet that criteria, however there is still a lot of video out there that does not meet this criteria.  

Fortunately, there's a really nice program out there called Handbrake that is capable of converting almost any file into an .mp4 we can use on the appleTV.  If you have not heard of this program yet, go out and get it NOW.  It's free and does an amazing job of converting all my files over.  


While I was satisfied with running Handbrake at first, I got REALLY tired of always having to load it up, select my files and settings and go ahead with the conversion.  I'm a really lazy person and am always looking for the simplest way to do the job.  That is when I got the great idea of automating the process. If you are running a mac, your computer comes with a great piece of software called Automator.  It's one of those things I never gave a second look to until I realized the power of the program, now I'm using it for almost anything.  

Automator gives you the ability to automate almost any task, and in this case, I got it to automate all conversions from any video format to .mp4.  Once its does the conversion it then moves it automatically into my iTunes and makes it available for me to stream to the appleTV.  I've gone from having to do several steps on my own, to sitting back and letting the computer do the work for me.  Let me explain how I set up the whole process.

Automating my Video Conversions 

The first step to automating video conversion was to download the command-line version of Handbrake.  By downloading the command-line version, we can run a script that will select all the options for us.  Here is the link to the page for downloading the command-line version.


Download the file and place it wherever you want, I put it into the applications directory under my home.  Now lets work on automating the conversion.

Open up automator from your applications and select folder action.  This will create a script that can be run whenever a file is saved to a folder (in this case it will be our video file that triggers the script)

You will see a huge number of options regarding all the tasks that you can automate.  After this blog, you will probably come up with a pile of ideas on your own and thats great, but for now lets stick to the task at hand.  Set up the following tasks as shown in the diagram below.  You might need to make minor adjustments such as changing the directory.  If you are unable to see the text in the pictures below, go to the originals and it should be clear.  You will notice, I use a temp directory that is off the home be sure to create it or the converted file will have no where to go!!!  I use that temp directory to store the converted file before I import it into iTunes. 


Feel free to add the following after if you would like to delete the file from the temp directory after the import.


Once you have the automator script finished all you need to do is set it up so that the script is activated in the right directory.  Save the automator file you just created and go to finder.

In your finder window, right click on the directory that houses all of your video downloads.  Select Folder Actions Setup as shown below.  Once in there you should be able to select the script and make sure it is attached to the automator script you created. 


That's it!  You're now complete and all video download with a file extension of .mkv or .avi should automatically be converted to .mp4 and imported into iTunes.

Hope it works out for you, please leave comments if you have any questions or improvements and let me know how its working out for you.  

Monday, August 27, 2012

SSH, Android and Security without Root

Maybe I'm a bit paranoid but I've always been a little worried about rooting my Galaxy Nexus phone.  I've got a lot of secure material attached to my phone and the security risk associated with rooting my phone is not a chance I want to take.


While I feel safer without having my phone rooted, it means that I have to be more creative with trying to implement some of the ideas that I have.  One of the big things I wanted to accomplish was setting up an SSH tunnel back to my home computer so that any time I might be on a public wifi network, I know that all of my browsing material would be encrypted.

For those of you who might be new to security, SSH is a protocol that allows you to connect in an encrypted environment back with your home computer.  By sending all of my web requests through the SSH tunnel, it will be encrypted and therefore secure on the public wifi network I might be on.

Before we get started, let me describe my equipment.

Phone: Galaxy Nexus (running android - jelly bean 4.1.1)
Computer: iMac
Router: Airport Extreme (if you are using a router to connect to the internet you will need to set up port forwarding)

Enable SSH on your Home Computer and setup Port Forwarding

I will be describing the setup using my iMac running Mac OS X v 10.7.4.  If you are running windows, you will need to figure out the steps yourself, however, the ideas should be the same.

It is important that we first select a static IP for use with the home computer.  If the IP of your home computer is always changing, you will not be able to properly set up port forward.

Set a Static IP

1.  Click on settings/network

2.  Go to Advanced/TCP/Ip and select manual configuration, select an IP address that is in your home network.  The other option is to go to your airport extreme or router and have it set up a static ip upon DHCP request for that particular machine.  The important thing is that the IP address of your home computer does not change!

Enable SSH

3.  Click on setting/sharing

4.  Turn on Remote Login

Enable Port Forwarding

5.  If you are not using a router you may skip this step.  If you are using a router it is important that you set up a port forward so that requests to your router get passed through to your computer running the ssh.  Unfortunately there are just too many different types of routers for me to go through each set of instruction so just figure it out yourself.  I myself prefer to forward a non standard port to the port 22 (ssh port) of my home computer.  I usually will not use the port 22 as I find it might be more secure to not advertise you are running an ssh server.

Get an SSH Client for your Android and setup up a Secure SSH Tunnel

My favorite piece of SSH software for the android is connectbot.  I'm sure there are others you can use as well.  The best thing is we do not need a rooted phone for any of the steps that we are doing.

Download Connectbot for Android 


6.  Go to Google Play and get Connectbot for your android phone.  In my opinion this is the best software out there to create a secure ssh tunnel.

7.  Add your new ssh server (the ip address will be whatever your internet ip address is and select the port that you decided to open to the public that will forward to port 22 of your home computer).  At this point you should be able to test your connection.  It will ask for your username/password of your home computer.  If you are unable to connect, STOP HERE and figure out what is wrong.  Chances are your port forwarding is not correct or you're trying to connect to the wrong IP address.  If you can not connect there is no point in moving on from here until you figure it out.  If you do connect, it should bring you to a command line, at which point you know everything is set up correctly.  Now its time to move on to the fun stuff.

Set up your Browser to use the secure tunnel.

We will be setting up SOCKS in order to browse the web through our tunnel.

8.  Now that we know we have a connection that works, feel free to create some port forwarding to make use of the secure connection.  Let's start with SOCKS.  Edit Port Forwarding (in connectbot) and add Type Dynamic (SOCKS) and use a source port of 8080 (or select your own).

9.  The only browser that I have found so far that works with SOCKS on the android is Firefox so grab yourself a copy.  The SOCKS setup with firefox is not obvious and not part of the UI so you have to be sneaky.  It took me awhile to figure out this part.  Go in to your firefox and type in about:config into the tool bar.  Search for proxy.


10.  Change the following!

network.proxy.socks 127.0.0.1
network.proxy.socks_port 8080 (or whatever you picked)
network.proxy.socks_remote_dns true
network.proxy.socks_version 4 (I believe that the MAC will only allow you to use 4.  Not positive on this)
network.proxy.type 1

11.  Disconnect and reconnect with your connect bot (it should port forward 8080 to socks) and now open firefox.  It should allow you to browse the web.  To test that it is truly using the socks/secure connection, turn off connectbot in the background, go back to firefox and it should cause your browsing to stop working.  If all goes according to plan, congratulations, you now have an SSH tunneled socks connection for secure browsing.  All browsing traffic in firefox is being routed through the SSH connection.

Now it's time for some more fun!  How about getting your desktop on your phone with a secure connection.

Set up VNC to use through your secure SSH session.

12.  First we need to go back and turn on VNC before we can do this go to setting/sharing on your MAC and enable remote management.

13.  Under remote management click on settings and turn on VNC viewers may control screen with password, Pick a password!  This will open up a VNC server on your computer (port 5900).   While the port will be open, it will only be to your internal network at this point.

14.  We need to set up another port forward under our SSH connection on our phone.  Select Type: Local Source port 5900 and destination localhost:5900.  This will allow requests to 127.0.0.1:5900 on our phone to go through the tunnel to our home computer.

15.  Get VNC software for the phone.  My favorite is JUMP desktop, but feel free to pick whatever you want.  You do not need to enable SSH in the VNC software as we are already dealing with it with connectbot.  All you need to do is connect to 127.0.0.1 port 5900 with the software and if connectbot is running you should be good.  Welcome to secure VNC.  Once again, if you want to test that it is working, feel free to turn off connectbot in the background and see if your VNC is still working, it shouldn't be.

At this point hopefully you are starting to see all of the stuff you can still accomplish without a rooted phone.  The two options I've told you about are only the beginning of what is possible.  I use my SSH to access my private webserver/uTorrent software/many other things.  I also use SSH for all file transfers.  If you want to set up secure file transfers, just get software on your phone like AndFTP and SFTP to your home computer.  If you have SSH open, SFTP is all ready to go, just type the IP of your home computer and select the port you opened earlier in the tutorial.

If you have any questions or seem to be stuck with anything feel free to leave a comment and I will see if I can help you out!  Remember that it will ONLY be the traffic that is routed through your SSH that will secure.  If you want a more comprehensive solution so that ALL traffic of EVERY app is forwarded through your SSH, you will need to root your phone and look at getting different software.